Make it a local call for anyone back home to call or message you anywhere!

IVR – Interactive Voice Response menus

Posted in News, Techie

We’re proud to have easy IVR menus ready for all of our subscribers.  IVR stands for “Interactive Voice Response”.  (Though the word “voice” is in there, an IVR menu typically executes actions through key presses.  In the first version of IVRs on EasyRinger, there is no voice support, but it’s coming!)

Everyone is, without doubt, familiar with IVR menus: “Thank you for calling <organization name>.  For sales, press ‘1’.  For technical support, press ‘2’” and so on.  We’ve created a simple UI that lets you build your own simple IVR system with up to ten options.

The IVR user interface

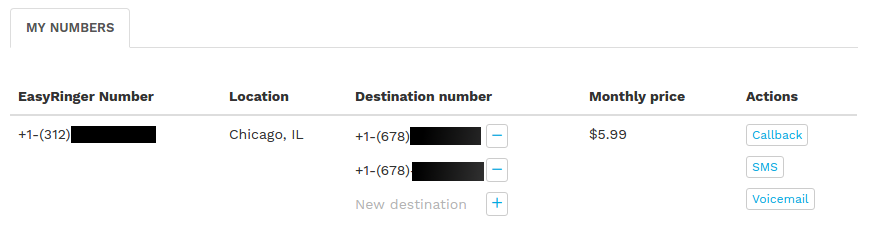
Each phone number can have its own IVR menu.  Like voicemail and other options, you can set up your IVR by using the “IVR” action to the right of your number when you log in to EasyRinger.

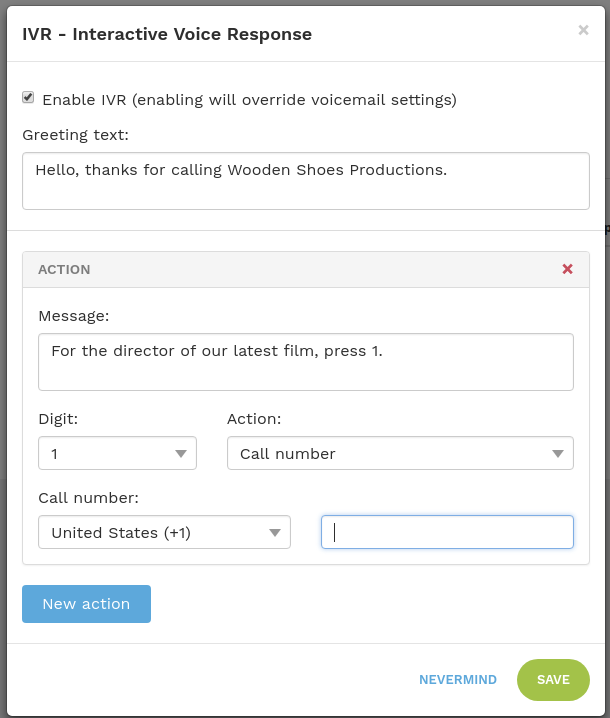
In the IVR user interface, the first thing to do is check the “Enable IVR” option.  This basically signals that your number will now ring straight to your IVR system.  Your destination number will be ignored.  And, your voicemail settings are ignored.

The “Greeting” text is the very first thing that your callers will hear.  You can type in the text that you want the system to read to your callers.

There must be at least one action.  Each action has a “Message” (which is typically something like, “For sales, press ‘1’.”, and so on), a digit on the keypad (which needs to sync up with what’s in the “Message”), and an action to take when the digit is pressed on the phone keypad.

Right now, we offer three actions:

  1. Call number – when the caller presses the corresponding digit, will call this number.
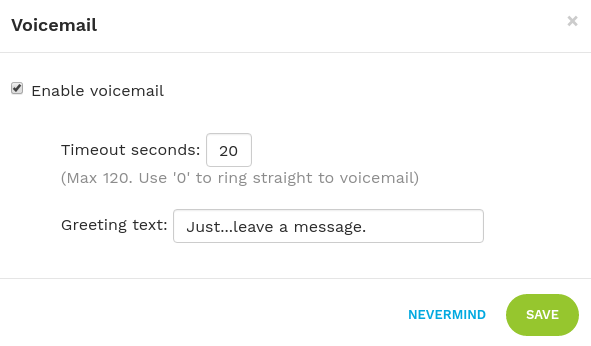
  2. Voicemail – goes straight to voicemail
  3. Read text – reads additional text to the caller

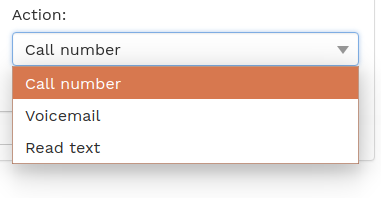
Available IVR actions

If you have multiple EasyRinger numbers, you can even chain IVR menus together by calling additional numbers that you own with their own IVR menu.

We are planning to add additional actions to the three above.  For example, “Play an mp3 file”.  Are there any other actions that you’d like to see?

Manage caller ID

Posted in News, Tips

You can now choose what caller ID you see when someone calls your EasyRinger phone number.  With caller ID, you have two choices:

  1. Your EasyRinger number
  2. The calling number

“The calling number” is standard caller ID behavior.  When someone calls your EasyRinger number, the call forwards to your destination and you see the number of the person who is calling you.

“Your EasyRinger number” will show you when your EasyRinger number has been dialed.  This way, you can answer your phone in a particular way.  For example, if you’re starting a small business or running a test market, you probably want to choose this option.

For callbacks (where you use EasyRinger to call out), the person being called will either see your destination number (if you’ve selected “The calling number”) or your EasyRinger number.

The “Caller ID” user interface is very simple.  Just choose the option you want!

caller_id

Ring multiple numbers at once

Posted in News
Would you like to have your EasyRinger number forward to multiple destinations – all at one time?  This can be great if you need to have a high success rate for answering calls to your EasyRinger phone number.  Just log in to your subscription and use the “+” buttons to add additional destinations.  You can likewise remove destinations by using the “-” button. And,
changing your destination is a simple matter of removing your current destination and adding another.


We are supporting up to five destinations at once, and will experiment with more as needed.

multiple_destinations_e

With multiple destinations, first one wins:  The first destination to answer the call, takes the call.  The other numbers will automatically hang up.


Please note that there’s a slight increase in price per call for each addtional number to ring.  Ringing five additional numbers costs around an extra one and a half cents per call.


Have another feature that you’d like?  Please send us a message!

Customize your voicemail

Posted in News, Tips
EasyRinger now lets you customize your voicemail to your liking.  You can even use text to change the message that your callers will hear.  EasyRinger uses an evolved text-to-speech engine that provides the most natural sounding response available.  Here’s a summary of the features that are available:
  • Enable or disable voicemail.  If you don’t like voicemail, just uncheck “Enable voicemail” and your number will ring until you answer.
  • Set the voicemail timeout.  Do you want voicemail to answer right away?  Set your timeout to “0”.  Or set it to something more standard, like 40 seconds.
  • Voicemail greeting:  Type a simple greeting in plain English (we are looking into supporting other languages) and that message will be read to your callers.
configure_voicemail
Have another feature that you’d like?  Please send us a message!

Callback billing records now show both legs of the call

Posted in News

We have changed our billing system to show you both legs of a callback.  A callback is when you use the EasyRinger service to make an outgoing call.  To summarize, when you instruct the EasyRinger service to call a number, the service will first call your destination number, then, when you pick up, will dial the number you want to call and connect the two.

As a result, there are two legs of the call:  one from the service to you and the other from the service to the party you wish to call.  Previously, the EasyRinger billing system rolled these two legs into a single billing record.  Now, you will be able to see both and the status will show “callback” so that you can easily associate the two together.  This way, you’ll be able to see the charge for both legs of the call.

If you want more information, you can read more about callbacks in our original blog post here.

How to Send an SMS Message

Posted in Tips
You can send SMS messages with EasyRinger.  First, log in to your subscription.  In the “Actions” to the right of your EasyRinger number, you’ll see a “Send SMS” button if your number supports SMS (older numbers do not support SMS).  Click on the “Send SMS” button and you’ll see the usual country select and phone number boxes.  Underneath that, you’ll see the box where you can type your message body.
When you click “Send” you’ll see a reminder message to let you know that your message will be queued immediately.
Not long after that (usually just a few seconds), the SMS should appear in your SMS history.

EasyRinger 2.0 is Here!

Posted in News
Welcome to the new EasyRinger, aka EasyRinger 2.0!  You can’t imagine the excitement we have over this new release.  Although there are lots and lots and lots of new features, we’ll just focus on the two big and top-level important features available with this new release:
  • Easyringer.com is now mobile-device-friendly.  Go to easyringer.com on any device and it will look great.  Small items will scale up on a mobile device.  Large items will scale down.  This includes both the public facing site as well as your subscription pages making it very easy to do normal tasks like update your destination, send SMS messages (more on that below), check your call records, and so on.
  • SMS is now supported!  Of course, this was the number-one requested feature and we’re happy to offer it now.  You can forward SMS messages to any destination number the same way that you forward calls.  You can also send outgoing SMS message by logging in and using the “Send SMS” button next to your number.

Signing up for EasyRinger and adding numbers to your subscription is pretty much the same, except you now can also see the capability of the phone number.

Access Callbacks from the Web

Posted in News

Now you don’t have to have an Android phone or iPhone in order to use the callback feature. You now have that feature available from the website. Just log in to EasyRinger with your email address and password. As usual, you’ll see your phone number(s) right there in front of you. On the right, you used to only see the “Set Destination” and “Remove” links. Now, you’ll see “Callback” there as well:

A new Callback option

When you click on the “Callback” link, you’ll see a user interface pop up that is similar to the “Set Destination” interface:

Make a call with the EasyRinger callback service

All you need to do here is select the country where your number is located and then type in the phone number without the country code.  For example, for a USA number, you would type in the area code, then the seven-digit number.  The “1” is added by choosing “United States (+1)”.  Then, click the “Place callback” button.  A message will pop up that tells you that the EasyRinger automated callback service will first call you, then connect you to the number that you wish to call.  So stand by for an automated call from EasyRinger!

If you have multiple numbers, it matters which “Callback” link you click on.  After you enter the number you want to call and click “Place Callback”, the automated EasyRinger callback service will call your destination number corresponding to the “Callback” link’s row.  Your virtual number isn’t even used for callbacks – only your destination number and the number that you are calling.

EasyRinger now supports Paypal

Posted in News

Want to use the world’s handiest online payment for EasyRinger?  EasyRinger now supports Paypal for signups and for additional calling credit.  Paypal is tightly integrated with our signup and on logged-in subscriber pages.


Android App 1.11 Released

Posted in News

We’ve just released version 1.11 of our Android app.  It includes a few bug fixes, plus support for more Android devices, plus a sneak peak at the new UI for our big 2.0 revision due out in the next months.  The new look is more angular and simplified.  We hope you like it!